| Most viewed - Our Home |
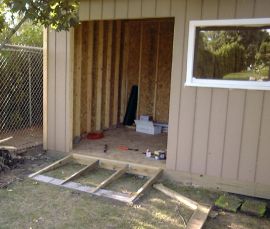
Ramp Stringers7789 viewsThe next step was to install the stringers. We used four, ripping them at the appropriate angle, and hooking them onto a 2x6 ledger board lag-screwed into the shed. The ends of the stringers are secured into the patio blocks with Tapcon screws. By the way, notice the window trim is white -- we have partially completed priming the trim, but have a ways to go. Eventually this trim will be dark brown.
|
|
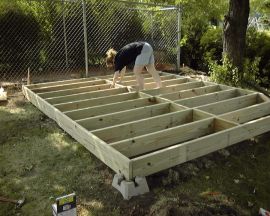
Foundation6724 viewsThe hardest part about the foundation was getting it all level. We laid out a level reference line over what we thought was level ground, but it ended up having about a 10" slope. Since we are building under several trees, height was a concern. We ended up excavating a lot of dirt to level out the site.
|
|
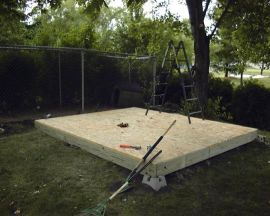
Finished Foundation5618 viewsThe finished foundation! The plywood went on very smoothly, and then we cleaned up the large piles of dirt excavated from under parts of the foundation. Finally, Tim got out the ladder to prune back some low-hanging tree branches in preparation for the rest of the building's construction. For the remainder of the week, we had a nice "raised wooden patio" as time commitments, as well as the weather, didn't allow us to get any further with building.
|
|
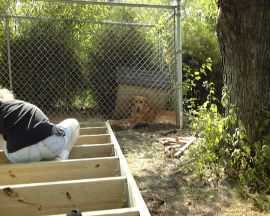
Shed Foundation with Bailey2686 viewsFraming itself for the foundation went quite smoothly, once we had the rim joists leveled and squared. In this picture, Cathy double-checks everything before we lay down the plywood on top, as Bailey looks on. The building is next to Bailey's outdoor run, but the run is plenty long so that it's not blocking much of his view.
|
|
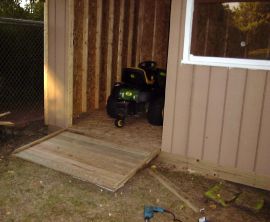
Ramp Finished2468 viewsThe final step was to install decking over the stringers. As a finishing touch, we used 2x2's on each side of the ramp to give it a more finished look and provide for a safety curb. As a test, we pulled the John Deere tractor in for the first time! After this picture was taken, the ground was leveled a bit in front of the ramp (using some of the sod to the right-- from the patio block step) so the start of the ramp is now smoother.
|
|
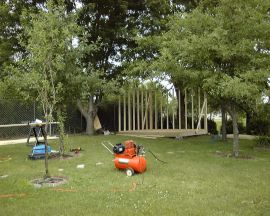
Framing2264 viewsCathy and I started framing on Friday, and on Saturday we were joined by friend Mike Becker who helped us frame the remaining walls, set them up, and set the roof trusses. This picture was taken relatively early on Saturday, after we raised the side and back walls and braced them into position. A pneumatic framing nailer was loaned to us by friends Aaron and Dawn Lundeen, and made the job infinitely easier and faster.
|
|
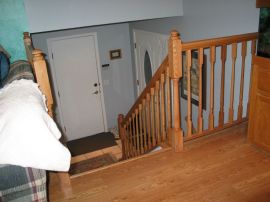
Oak Railings1974 viewsHere is a view of our new oak railing that we finished installing in March 2004. We have many more pictures of this project in the 'projects' section of this website.
|
|
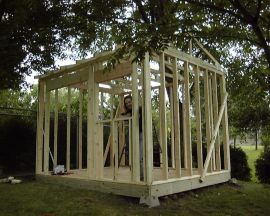
Framing Finished1918 viewsWe didn't pause to take any other photos-- this one shows where we stopped for the day when rain started falling. The front of the building will have a roll-up door and a window (being demonstrated by Cathy). We made good progress before the rain-- getting all the walls framed and trusses up and temporarily braced.
|
|
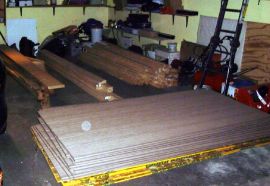
Building Materials1751 viewsHowever, the following weekend was our "framing blitz". We prepared for it Thursday by picking up a ton of building materials at Menards. Here is a photo of many of the building supplies sitting in our garage Thursday night. Sorry for the poor quality -- the digital camera we had at this time took lousy flash photos.
|
|
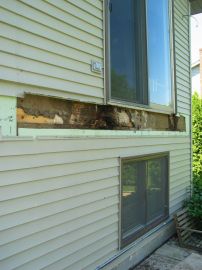
Rotten rim joist1634 viewsUpon removing the old ledger board, we found a terrible site -- water had seeped down beneath our patio door, for who knows how many years, and completely rotted out a large chunk of the rim joist supporting the back of the house, as well as the deck.
|
|
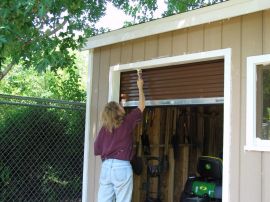
Door installed and Trim Priming1592 viewsThe next step was to install the roll-up door, which was fairly straightforward, and install the trim around the opening. Then we needed to finish priming all of the bare wood. The siding was pre-primed, but all of the trim, soffits, and fascia boards needed priming. Here Cathy primes the trim near the roll-up door.
|
|
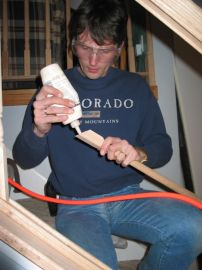
Gluing Ballusters1521 viewsEach baluster was glued, then brad-nailed with a pneumatic nailer.
|
|
| 160 files on 14 page(s) |
1 |
 |
 |
 |
 |
 |
 |
 |
 |
 |
 |
 |
|
